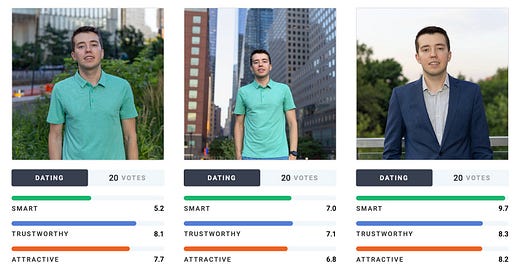
TL;DR: take the photo from a tripod, with a flash, during golden hour, with a nice background, while wearing a suit. Pick the highest scoring photo via Photofeeler. Keep reading for the long answer.
Interested in someone taking the photos for you in Seattle or NYC? Check out my paid services website. $500 for a photoshoot, you only pay if the photos score great on Photofeeler. Or do it yourself per the full guide below :-)
The internet is full of memes about how bad male dating photos are. But how does one do better? Ask your female friends to take your photo? Hire a professional photographer? Attend events in the hopes of someone taking a candid shot? Let’s break down what it takes to take a perfect photo.
Technical aspects
A blurry photo is useless and so is a photo that’s too dark, too bright or too small. Let’s go over the list of basic technical requirements and then move on to clothing, posing, editing and curating.
Focus
There are exceptions for this in the world of art but for the purpose of dating you need the photo to be perfectly focused on your face. Phones usually get this right these days but they can also mess it up if the subject is moving or if the lighting is poor.


Exposure
Exposure refers to the amount of light captured by the camera. For the purposes of dating photography, it’s usually the case that it’s better to be over-exposed than under-exposed as bright photos attract more attention. It’s particularly important for the face to be well-exposed.


I recommend setting your phone or camera to over-expose by 1/3 of a stop, as being slightly over-exposed is better than being under-exposed.
Resolution
If the person is too small within the frame of the photo you might be tempted to use the crop tool to improve the framing. However cropping has inherent limitations due to the original resolution of any photo not being unlimited. For a phone photo, a 2x crop is the most I’d consider doing. For a DSLR photo a 4-8x crop should be acceptable.


Focal lengths
How close your camera is to one’s face changes the resulting geometry of the face in the photo. This is referred to as “focal length” in photography and the standard unit is millimeters. A “wide angle” lens is at 35mm or lower, a “normal” lens is between 35mm and 85mm, a “zoom” lens is anything above 85mm. A standard phone camera has a focal length of around 24mm for the main sensor, making it a wide angle lens.
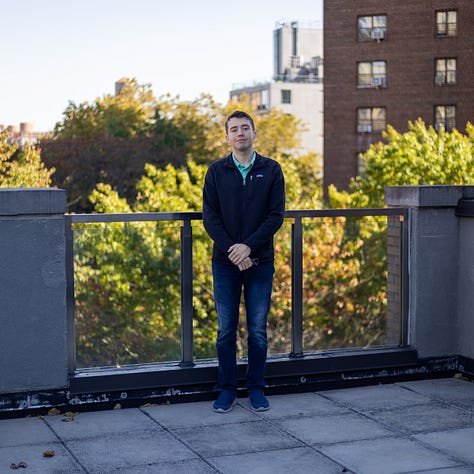
Here’s a portrait of the same person at focal lengths of 24mm, 50mm and 135mm:


Notice how much more prominent the nose is on the 24mm photo. People usually look best at focal lengths of 50mm or above, so you want to avoid taking portraits at smaller focal lengths. The iPhone 14 Pro has three cameras: ultra-wide (13mm equivalent), wide (24mm) and telephoto (77mm). This means that iPhone users should ideally capture portraits with the telephoto lens, as it’s the only one with a focal length above 50mm.
Focal length is also the reason why you should never use selfie photos for a dating profile. The selfie camera has a focal length of around 24mm, which creates too much geometric distortion. Selfies have a bad rep in general in the dating world and are associated with low-effort profiles.
Bokeh
Bokeh refers to the degree to which objects outside the focal plane are blurred out. Since professional cameras usually have a stronger bokeh such photos are usually perceived as being more “professional”. The degree of bokeh depends 3 components:
Sensor size: the bigger the sensor, the stronger the bokeh. For this reason phone cameras usually have little bokeh by default, though modern phones can also simulate bokeh using software.
Focal length: the longer the focal length of the lens, the stronger the bokeh.
Aperture: the bigger the aperture, the weaker the bokeh. See this page for an in-depth explanation of what aperture is.
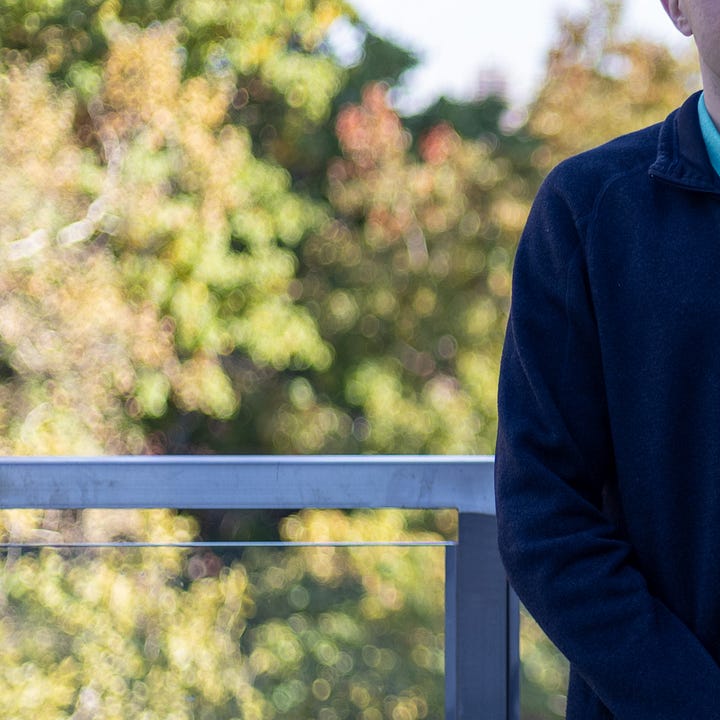
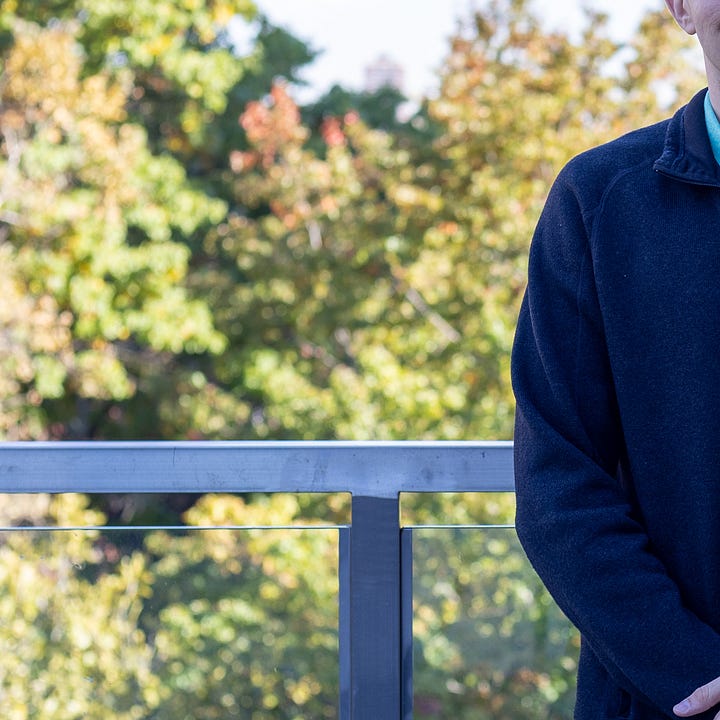
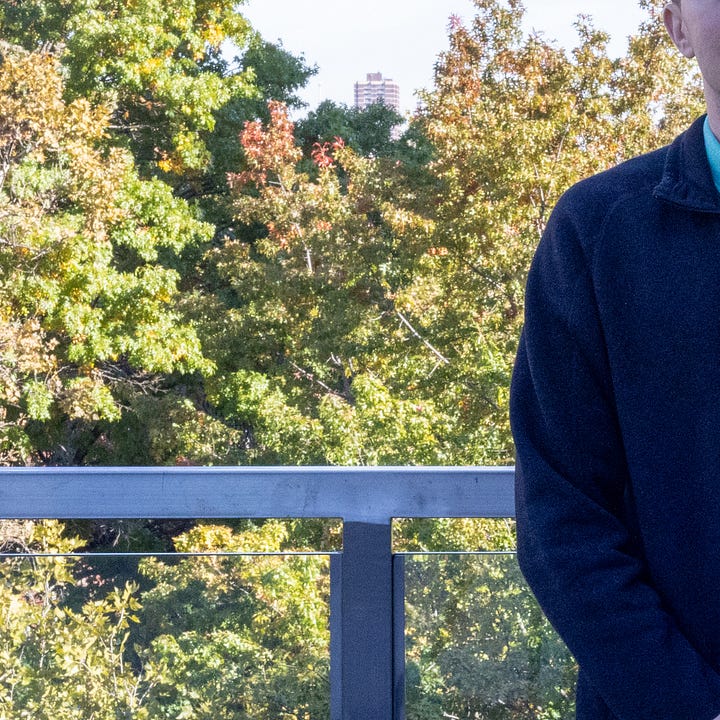
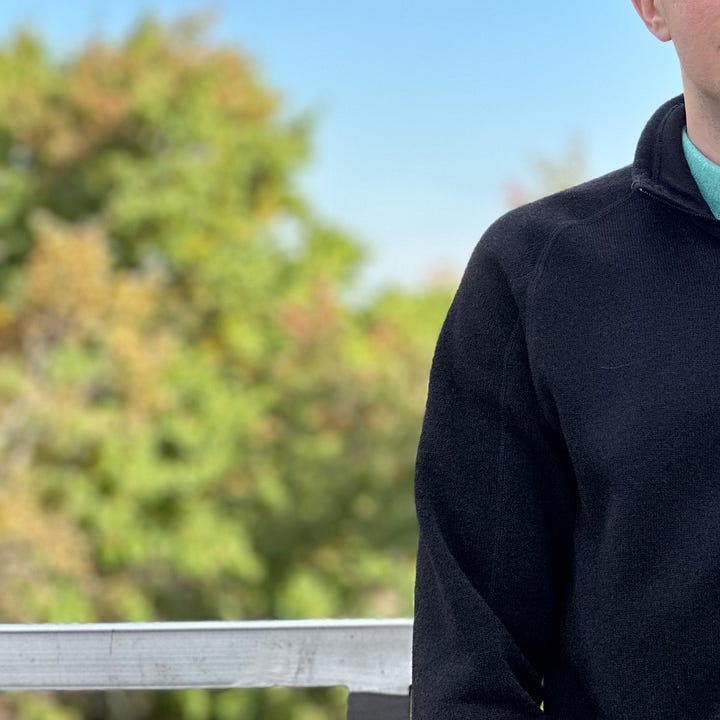
For the purposes of dating photos it’s generally preferable to have medium-to-strong bokeh, as it gives the photo a “professional” flair and naturally shifts the viewer’s focus on the person. If you’re shooting on a phone, portrait mode will usually have artifical bokeh enabled by default. If you’re shooting with a DSLR, shoot with a low aperture value and use a 50mm+ focal length lens.
Color rendition
For a dating photo, you generally want warmer colors, as humans naturally associate them with friendly vibes. There can be exceptions depending on your style – for example a goth might want cooler colors to match their personality better.


Notice how the cold colors in the first photo make the skin color look a bit “ghastly”. This is easy to adjust in post-processing but can also be done within camera settings.
Lighting
It’s very important to ensure that the subject’s face is lit by a soft source of light. This means avoiding photos where the sun is directly overhead. Instead, aim to take pictures in the first 15 minutes after sunrise or the last 15 minutes before sunset. In photography this time period is known as the “golden hour”.
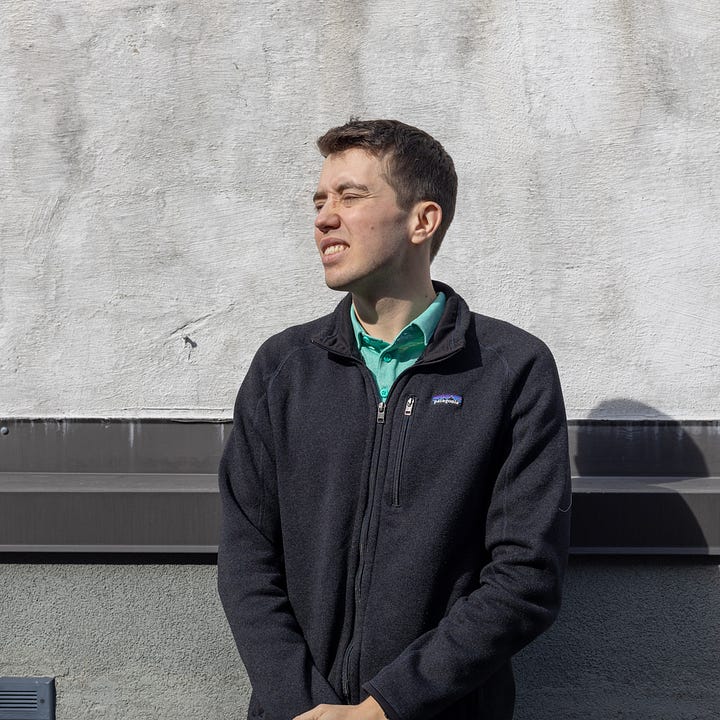

Notice several problems with the left photo:
The person has to squint as the sunlight is very strong in the afternoon. Compare to the right photo where no squinting is necessary as the sun isn’t too strong around sunrise.
Harsh lighting creates strong shadows on the face, making it less attractive. Photo on the right has no shadows visible.
Skin generally looks less attractive with harsh lighting, as strong sunlight accentuates every defect.
If you’re not shooting at sunrise or sunset, place the subject in a shadow instead to improve the lighting situation. If you have a DSLR you can then make the lighting nearly perfect by using a flash.


Notice how the flash entirely gets rid of shadows of the face and makes the skin appear more attractive. The second photo is better but looks a bit unnatural due to the background being lit by strong sunlight while the subject is primarily lit by a flash. This is accentuated in the third photo where the subject is lit equally by the setting sun and the flash, thus avoiding a strong contrast with the background.
Your lighting options from worst to best are:
Strong sunlight, directly overhead
Shadow, no flash
Shadow, using a flash
Soft sunlight, around sunset or sunrise (“golden hour”)
Soft sunlight combined with a flash
If you’re shooting on a phone, you can somewhat improve the lighting situation by using “portrait mode”. When enabled, the phone uses software to increase the exposure of the face in addition to blurring the background. This is still not as good as using a flash but it can sometimes save an otherwise difficult lighting situation.


Equipment
You could just use ask your friend to take pictures of you with a phone and skip this section. But you’ll get better results if you invest a bit of money into:
- Used DSLR from Ebay. Get any 20+ Mpx camera that still works. Canon, Nikon or Sony are solid options. Approximate price: $350.
- Standard 50mm lens. Cheap, versatile and within the optimal focal range for portraits. Approx. $150.
- Used tripod. Allows you to take photos alone whenever you have time. Approx. $50.
- Used flash. I recommend Godox flashes, get one that’s compatible with your camera model. Approx. $50.
- Flash diffuser. These usually come included with the flash, if not you can grab one for $5 from Amazon.
For $600 you’ll get a nice basic set for photography and you could probably resell the kit for at least $400 after a year or two.
Phone vs DSLR
Do you necessarily need a DSLR to take a nice dating photo? No, but it helps a lot thanks to having a higher true resolution and the ability to use flash. I strongly recommend investing a bit of money into a used DSLR if you can afford it. Modern phones do a great job but DSLRs are still better as of 2024.


Recommended camera settings
For phones: configure exposure to +1/3, use portrait mode, switch to the telephoto lens if available.
For DSLRs:
- Aperture priority mode
- Aperture: 2.8 or smallest supported by the lens
- Exposure time: 1/125 or higher
- ISO: auto
- Exposure adjustment: +1/3
Clothing
For your primary photo, you should ideally be wearing a suit or at least a blazer over a white collared shirt. Make sure it’s well fitting and not baggy: this article has good visual explanation to get you started. Photofeeler raters will usually give a 9+ “Smart” rating to a person wearing a well-fitting suit and it also enhances the “Attractive” category by proxy. A small percentage of men can pull off “alternative” styles well but suit is the best option for everyone else.
For secondary photos wear well-fitting, relatively stylish clothing. This applies even if you’re taking photos playing beach volleyball or hiking - your clothes should be well fitting and appropriate for the occasion.


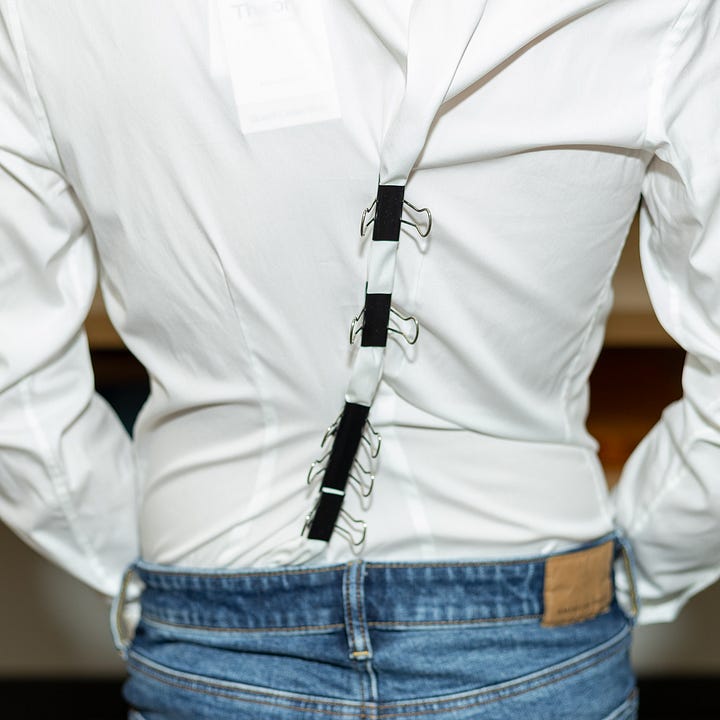
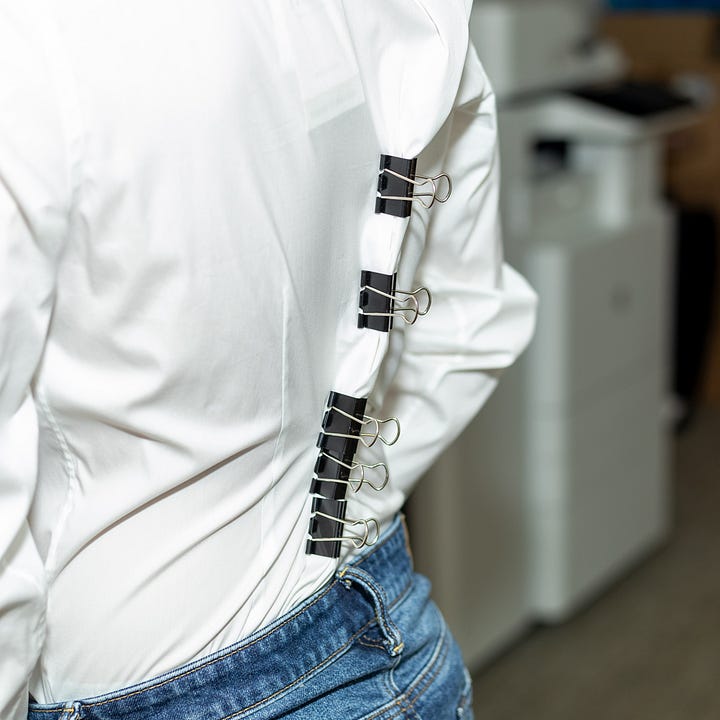
You can borrow a secret of professional fashion photography in case your shirts aren’t tailored: take a few binder clips and use them to tighten the fabric behind your back. This will make any shirt look fitted in photos.
What’s Photofeeler and why should I use it?
Photofeeler operates by allowing you to upload a photo and, for a fee, have it evaluated by a number of individuals of the opposite sex, anywhere from 5 to 100 people. Your photo will be assessed based on three criteria: intelligence, trustworthiness, and attractiveness. The interpretation of these criteria is somewhat subjective as there is no precise definition provided, leaving it to the discretion of each evaluator to apply their own understanding. Roughly speaking:
Intelligence: how well dressed and “intelligent” looking you are.
Trustworthiness: how warm your smile is and whether you look “dangerous” or not.
Attractiveness: how flattering the photo makes you look. It’s easier for hot people to get a high attractiveness rating, but almost everyone can get a high score here with the right shot.
The system employed by Photofeeler attempts to mitigate the impact of individual bias in ratings. It adjusts each vote in comparison to the average vote typically given by that rater. For instance, if one person commonly gives a rating of "Somewhat Trustworthy" and another frequently rates photos as "Very Trustworthy," then a "Very Trustworthy" rating from the first person will carry more weight in Photofeeler's algorithm compared to the same rating from the second person. Conversely, if a photo is rated as "Somewhat Trustworthy" by both individuals, the rating will be penalized more heavily because of the second rater's typical leniency.
In addition to having your own photos rated, you can provide ratings for the photos of others on Photofeeler. Doing so earns you complimentary credits that can be applied to have your own photos rated. However, this free version is slower and results in fewer votes for each photo submitted.
Your goal is to take a photo that ranks at least 8.5+ on the “Attractive” metric. Ideally it would also be ranked 8.5+ on the “Smart” and “Trustworthy” metrics. Achieving a great score on all three is challenging due to “Trustworthy” and “Attractive” being somewhat in conflict with each other: for example, smiling and looking directly into the camera raises your “Trustworthiness” but for lots of men this pose is less attractive than a slight smirk and looking off-camera. I’d suggest focusing on Attractive+Smart and then pick the most “Trustworthy” photo if you have several high-scoring options.
The most optimal approach is to upload a bunch of photos, pay for 10 ratings, and then pay for 10 more for the best scoring photos. In my experience 20 votes is usually enough to determine whether a photo is worth putting up on a dating profile. If you have two photos that are very close in rating, you can always pay for 10 more ratings for each to break the tie. I also recommend cropping each uploaded photo to a square and zooming it in, as Photofeeler raters only see a medium-sized version of the photo rather than the full resolution image you upload.
Should I hire a professional photographer?
Most of the time the answer is no. Professionals rarely use Photofeeler to evaluate their work (even if they brand themselves as “dating” photographers) and as a result their work might look highly professional but score poorly in a fair evaluation via Photofeeler. I’m convinced that dating photographers should offer refunds when none of their pics score highly on Photofeeler, but I’m only aware of one such photographer at this time (disclaimer: it’s me, you can hire me in NYC or Seattle).
If you do hire a photographer, I suggest uploading their portfolio photos on Photofeeler first and checking how they rank. If none of their best shots scores a 9.0, I’d be wary of paying them without a refund guarantee.
Should I just ask a female friend to take photos?
If they’re willing to spend a lot of time taking photos with you, absolutely. But a quick photoshoot over one afternoon is unlikely to produce great results immediately. Thanks to the magic of Photofeeler you can get the opinion of 20 different women instead of one, which is far more objective, rather than relying on the opinion of your one or two friend.
Iterative Posing
Capturing the ideal photo requires several iterations to discover the optimal body posture and facial expression. This varies from individual to individual, and your objective is to identify the precise mix that would receive the highest ratings from Photofeeler users. You can accomplish this through a combinatorial method, systematically exploring every possible combination of:
Smile: none, smirk, full
Body orientation: facing left, facing center, facing right
Vertical head angle: looking down, looking straight, looking up
Horizontal head angle: looking right, looking straight, looking left
This results in a total of 3^4 = 81 combinations to try against each background. This methodical strategy allows you to determine the most flattering combination for your unique facial and body characteristics.


The easiest way to achieve this is to set the camera (or the phone) on a tripod and turn on interval timer mode. Most DSLRs support this out of the box; for phones you can use this Android app or this iOS app.
Maintain a straight posture in all the poses; slouching is universally unappealing.


Choose a good background
The background of your photos is just as important as your clothing, style and facial expressions. You want to avoid anything too blank, too sterile or too “industrial”. Avoid photos in your own home or in messy environments.


Good background ideas are: parks, forests, flower beds, modern architecture, beaches, cobblestone streets, rock climbing gyms, rooftops, cute cafes, ski resorts, scenic overlooks. Iterative posing might be hard in some of these locations but you can always snap a couple dozen quick pics and throw them on Photofeeler to see if anything worked out.
Photo management with Lightroom
I recommend buying a subscription (~$10/month) to Lightroom Classic, which is the desktop version of the Adobe Lightroom software. It makes it very easy to pick the best photo out of hundreds of shots and then editing the best ones to perfection. You can crop, automatically adjust contrast and highlights, improve the color balance, remove small blemishes, etc. Youtube has lots of free guides on how to use the software - it might seem daunting at first, but you’ll save lots of time in the long run.
Closing thoughts
Hope the article was helpful. If you have any questions, drop a comment below or shoot an email to sokolx (at) gmail.com. Good luck!
Interested in someone taking the photos for you in Seattle or NYC? Check out my paid services website. $500 for a photoshoot, you only pay if the photos score great on Photofeeler.
